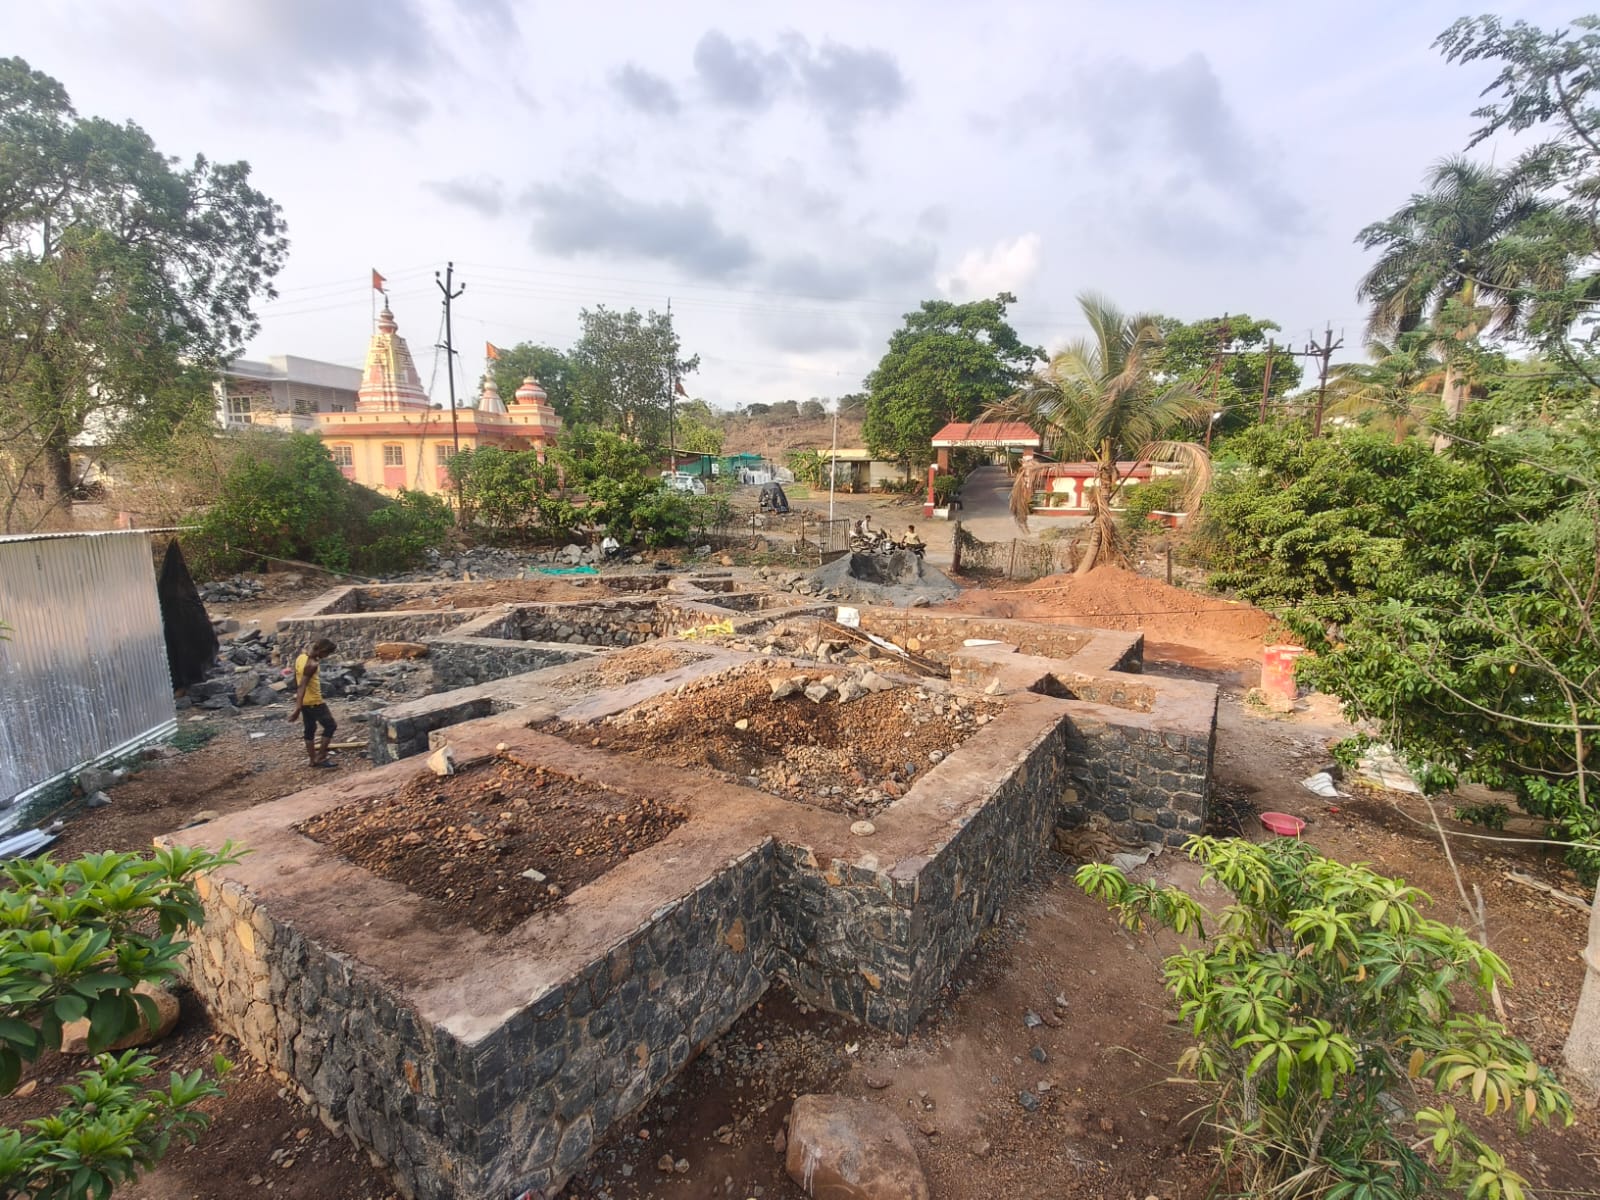
Plinth / Plinth Beam

Methods

  • Kalache Bandhakam — stone masonry left rough below ground, finished face above
  • Stone masonry plinth walls, built up past 4ft
  • Water storage tank (7-day capacity) built under the courtyard instead of a separate dug pit
  • Plinth beam formwork and reinforcement to follow

Materials

  • Stone for plinth walls
  • Brick and mortar for the water tank lining
  • Lime mortar

With the foundation complete, stone masonry plinth walls went up — and came in higher than originally planned, well over 4 feet. The technique used is locally called Kalache Bandhakam: the stonework is left rough below ground, and the same wall gets a finished, dressed face above ground.
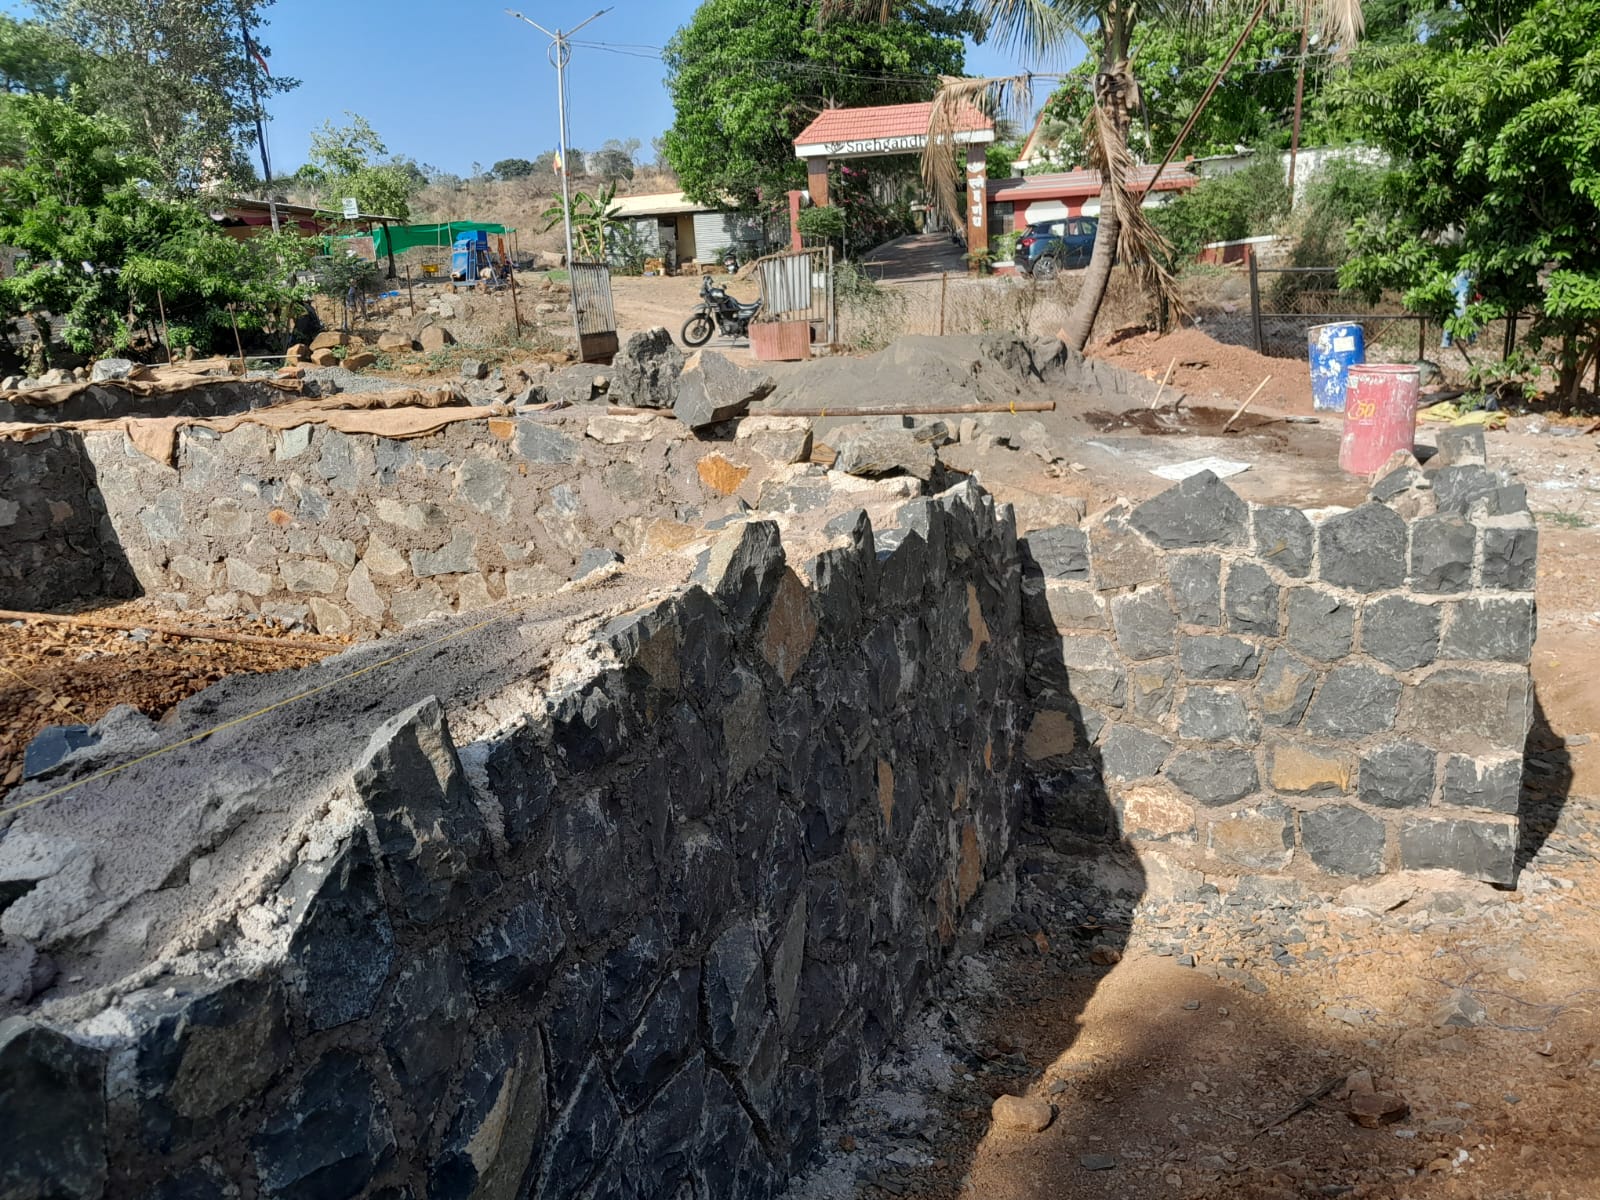
Close-up of the plinth wall showing the dressed, finished stone face above ground

That extra height opened up a possibility. The build needed underground water storage with 7 days of capacity. Rather than digging a separate pit elsewhere on the plot, the tank was built directly under the courtyard, using the space the taller plinth already created.
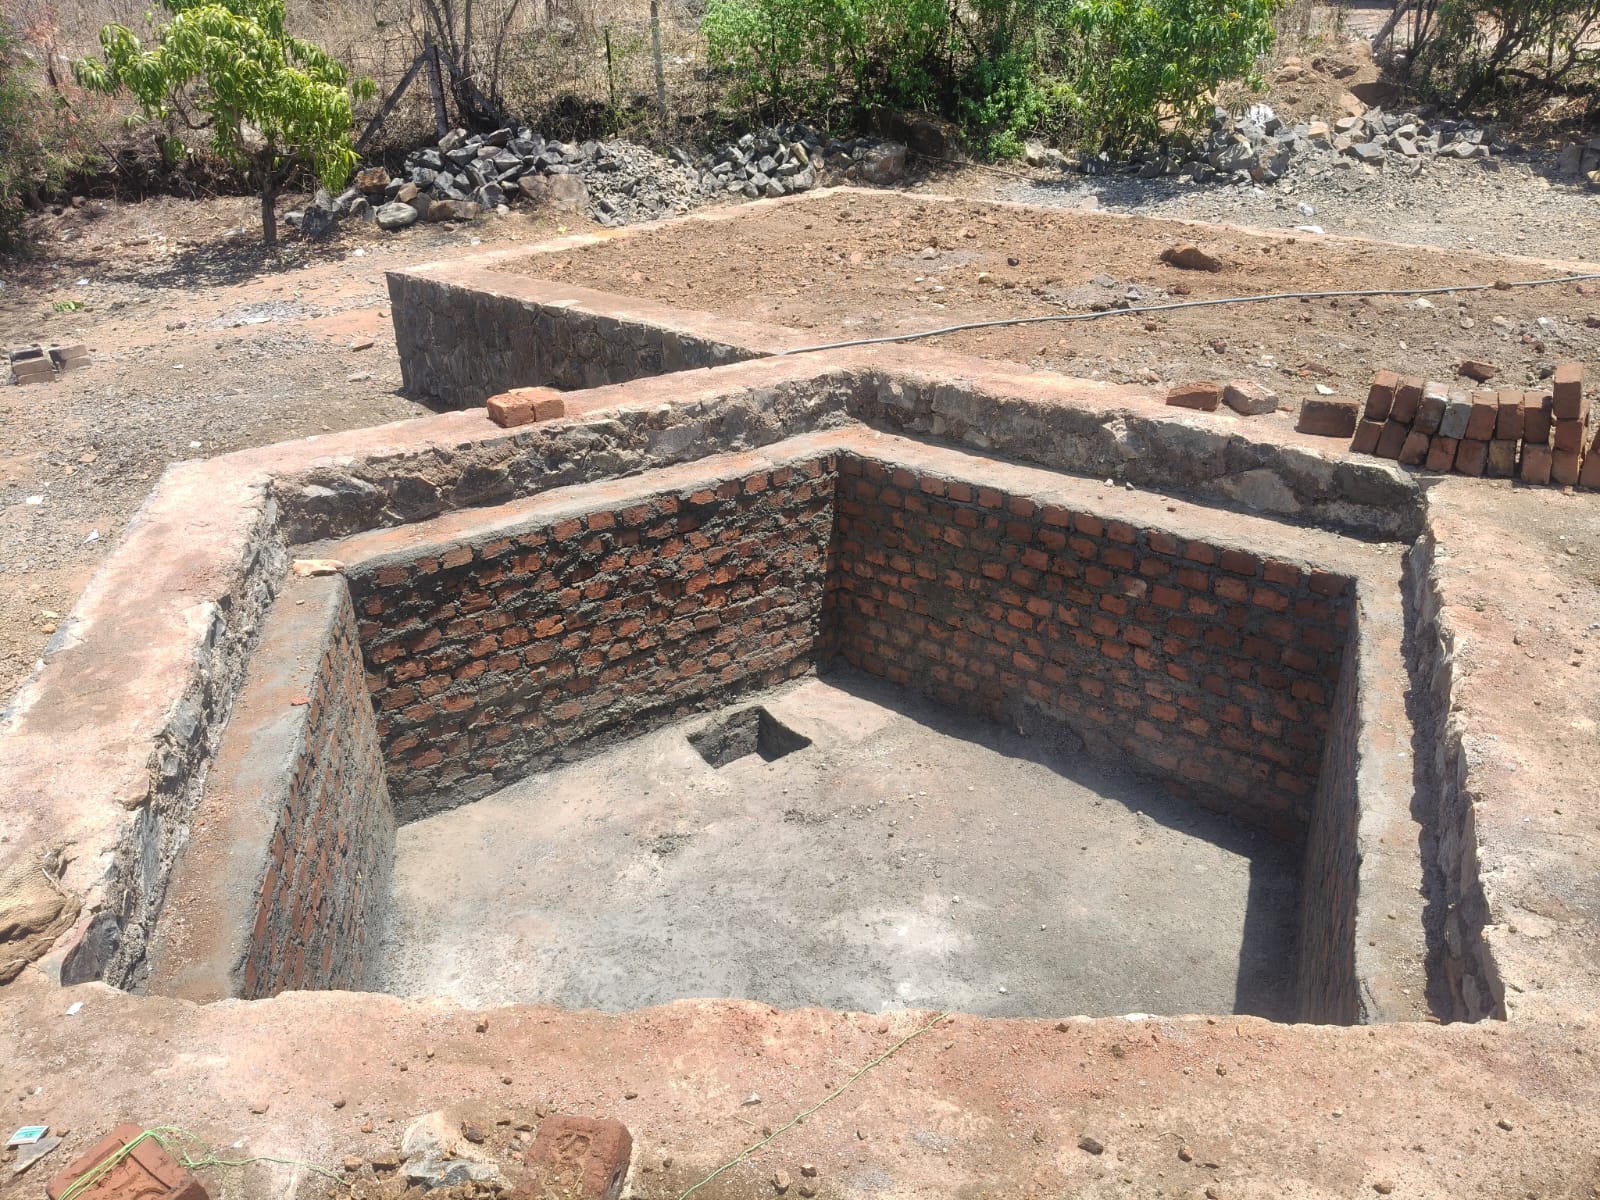
Brick-lined water storage tank built under the courtyard, within the plinth structure

Status

Plinth beam work is now the focus, building on top of these walls.

See the journal entry for the full write-up, including a walkthrough video of the finished plinth.

Lessons Learned

  • Extra plinth height doesn't have to be wasted space — it can double as room for underground services
  • Locating the water tank under the courtyard avoided a separate excavation elsewhere on the plot
  • Plinth beam work bridges foundation and wall — precision here saves wall alignment issues later

Esc or click outside to close